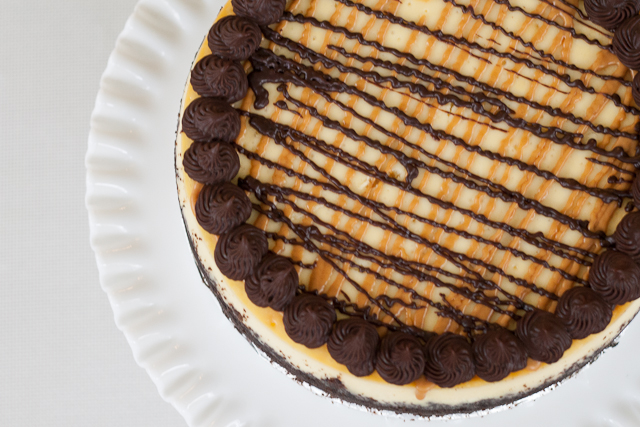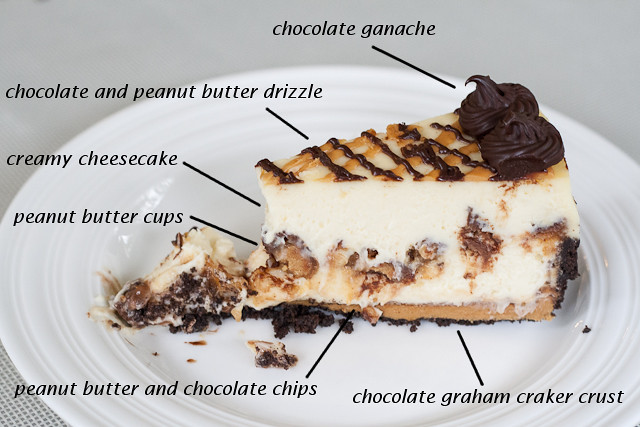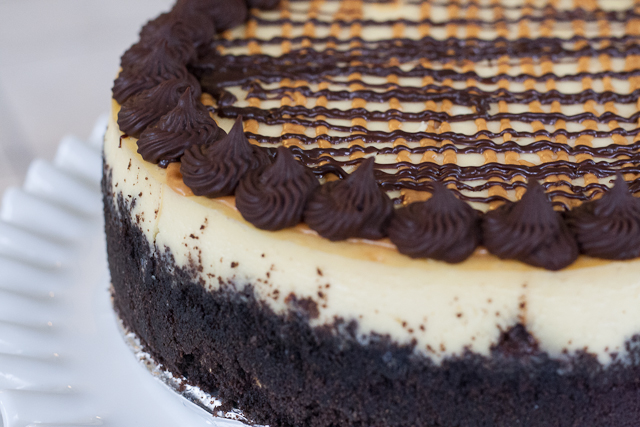
Cheesecakes are a really rich dessert and this one is no exception. It takes a bit of patience to make but it is sooooooo worth it.

It is really important that all of your ingredients are at room temperature when you mix your cheesecake and you want to be sure to cool it slowly. That will make a nice smooth cheesecake with no cracks on the top, I really hate it when my cheesecake cracks! So make sure you take your cream cheese and your eggs out of the fridge and sit them on the counter for a few hours before you make the cake. You can also put your eggs in a bowl of warm water to warm them up if you forget to take them out.
You will also want to bake the cake in a water bath, basically just a pan of water for the cake to sit in while it bakes. It will help the cake cook evenly and also helps prevent those dreaded cracks.
Chocolate Graham Cracker Crust
Ingredients
- 2 cups chocolate graham cracker crumbs
- 6 tablespoons melted butter
Directions
- Preheat oven to 350°F.
- Grease bottom and side of 9" spring form pan.
- Wrap bottom of pan in 3-4 layers of foil.
- Mix chocolate graham cracker crumbs and melted butter together in a bowl.
- Press crumbs into bottom and halfway up sides of pan. Use a measuring cup to help push crumbs into the corners.
- Bake crust for 7 minutes. Remove from oven and set aside to cool.
Peanut Butter Cup Cheesecake
Ingredients
- 1/4 cup chocolate chips
- 1 cup creamy peanut butter melted
- 32 oz cream cheese at room temperature
- 1 1/4 cups sugar
- 4 eggs at room temperature
- 3/4 cup heavy whipping cream
- 1/2 tablespoon vanilla extract
- 12 peanut butter cups chopped into small pieces
- Chocolate ganache and peanut butter for garnish (directions below)
Directions
- Preheat oven to 350°F.
- Put a pot of water on stove and start to heat it over medium heat (you will use this for a water bath to bake the cheesecake in).
- Spread chocolate chips on top of crust.
- Pour melted peanut butter over chocolate chips. Shake pan to spread peanut butter. Set aside to cool
- In a large bowl, beat cream cheese and sugar until fluffy.
- Add eggs one at a time, beating after each egg.
- Add Whipping cream and vanilla and mix until combined
- Spoon about 1/2 cheesecake mix into crust. Place peanut butter cups on top of batter. Gently spoon the rest of the batter over the peanut butter cups.
- Place the pan inside a larger baking dish and place it in the oven, pour the water from the stove in the baking dish around the spring form.
- Close oven and bake cheesecake for about one hour and 15 minutes. The edges will be set but the center will still look jiggly. Turn the oven off and leave the cake in the hot oven with the door closed for one hour. After the hour, take the cake out and let it cool on the counter for an hour. Then put the cake in the fridge to finish cooling for at least 4 hours.
- Garnish cake with chocolate ganache and peanut butter.
Peanut Butter and Chocolate Ganache topping
Ingredients
- 2 tablespoons peanut butter
- 6 oz chocolate chips
- 1/2 cup heavy whipping cream
Directions
- Melt peanut butter in microwave.
- Pour peanut butter into a ziploc bag and cut a small hole in one corner. Drizzle peanut butter over cooled cheesecake
- Place chocolate chips in a bowl
- Heat whipping cream on stove over medium heat.
- When cream begins to bowl, pour it over chocolate chips.
- Whisk chocolate and cream until smooth.
- While the ganache is still a little warm, place a small amount in a ziplock bag and cut a small hole in one corner. Drizzle chocolate on top of peanut butter.
- Place the rest of the ganache in the fridge to cool completely. Once cold, place it in a piping bag to pipe around the edge of the cake.


Oh my stars!!! That is incredible.
ReplyDeleteCurious about efficient event management tools? I just discovered a fantastic resource that could revolutionize how you handle events! Check out https://lionwood.software/domains/event-management/. This site offers an impressive array of tools designed to streamline every aspect of event planning, from registration to post-event analysis. With features like automated scheduling, detailed analytics, and customizable registration forms, it seems to cater to both small gatherings and large-scale conferences.
ReplyDeleteThe user interface looks intuitive and is packed with practical functionalities to make the entire process smoother. Whether you're organizing a corporate event, a community gathering, or a personal celebration, this site provides all the essential tools to ensure everything runs seamlessly. I found the platform particularly helpful and easy to navigate. If you're in need of a reliable event management solution, this site is definitely worth exploring. I hope it helps you as much as it helped me!